Woodwork Blog
As an antidote to our often fast paced and technology based lifestyles, I dedicate as much time as I can towards my favourite hobby of woodwork. In fact, it’s an obsession!
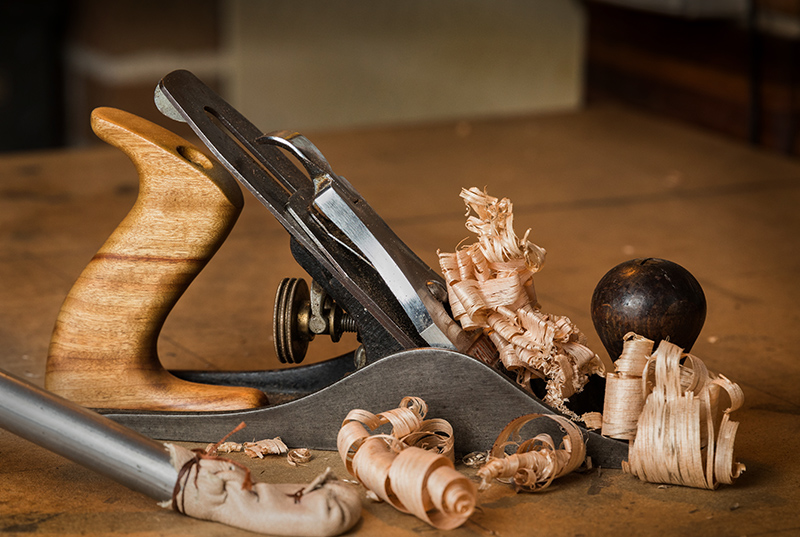
Some of my favourite memories are the feeling of uncovering something unique and beautiful hidden within a material that is considered ‘waste’ by others and liable to be thrown out or burned. I love the the feeling of my hands and body using a well tuned tool to shape wood and bring a vision in my mind come to life. For me, it is being in a state of pure creation and awe at the beauty of nature and the natural world.
It invokes in me, lifetimes of working with the land and the trees to provide shelter, sustenance, human connection and craft. I feel like I become a caveman, a viking, an explorer, a restorer and I use the intelligence of my body to remember the ways in which humans and animals have lived and evolved.
What are we, without knowledge and tools?
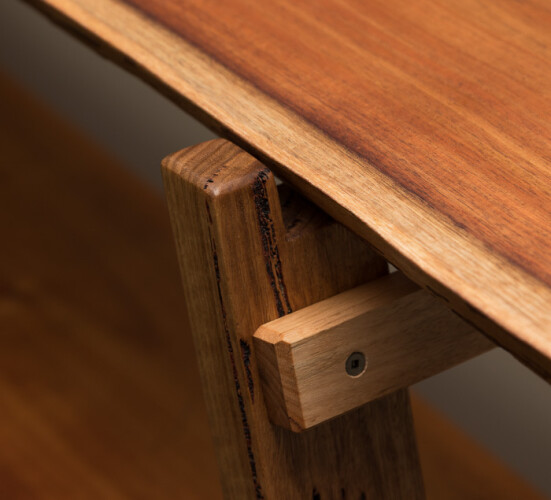
Blackwood ‘Storage Rack’
I made a wood storage rack…

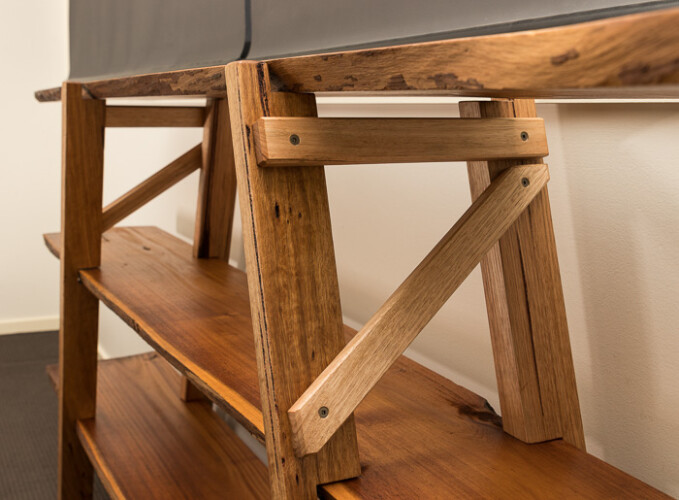
Whilst it may seem strange, that is genuinely the primary purpose of this build. As yet, I have no house and shed to my name and whilst renting in various places, there is very little space to store timber. The furniture I make at the moment must be multi-purpose with the ability to quickly pack down for transport. It must also be able to be hoisted up balconies, drawn through tight front entrances (no pun intended) and placed on car roof racks.
I had 5 slabs of Blackwood that were taking up space. I chose the best 3 for this job. They were all a bit twisted, cupped and bowed. The design of this ‘wood storage rack’ not only maintains the timber without damage (joinery mortices, screw holes etc), the internal forces and external loads applied will straighten some of the bows and twists.
This has been a workout for the mind as the timber was not only twisted, cupped and bowed but also because of the live edges, the side dimensions are not consistent. I have learned a lot from the past two main projects I have worked on in terms of the final layout and fitment.
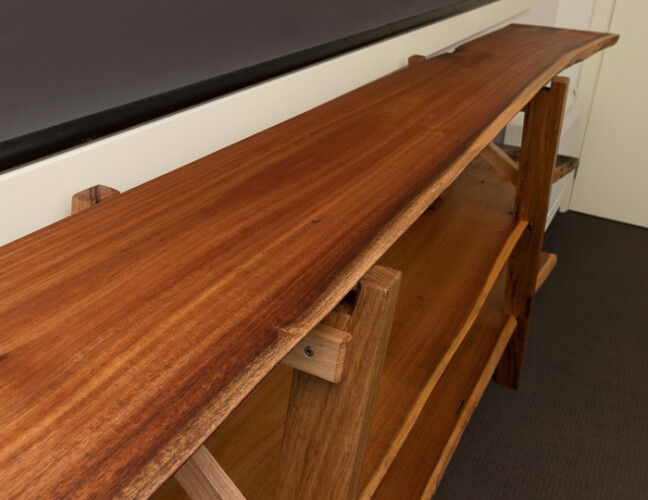
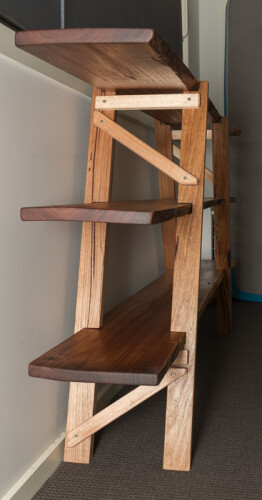
The look is quite rustic which was the idea. Upon installing it, I realised that it will take a while to grow on me. I would prefer a more elegant and fluid design. The F17 hardwood for the legs came from a local timberyard during the first COVID lockdown in Melbourne as it was the only timber I could source at the time. Thankfully a total legend working there was happy to help me sift through the racks to find a couple of pieces that were usable. The front pieces look to me like Messmate and the rear legs have pink tinge to them so I’m assuming they are made of ‘Tasmanian Oak/Ash’.
The funny thing is… this project took place over about 4 months… I started it… lockdown 1.0 happened… and after I cut the mortices in the legs, I decided to build a workbench before finishing the project. The workbench took a couple of months to complete, hampered by limited materials and basic equipment. I then set up a mini workshop in the shared garage area… and four months later have finally gotten it done.
I am very glad that I took my time as in the process I attempted to learn as much as possible. For example, before cutting the ends of the slabs square, I installed a fine cut blade in a mitre saw and squared the blade to the fence. Fairly basic operations however I’d never done them before and they are now helpful skills for life.
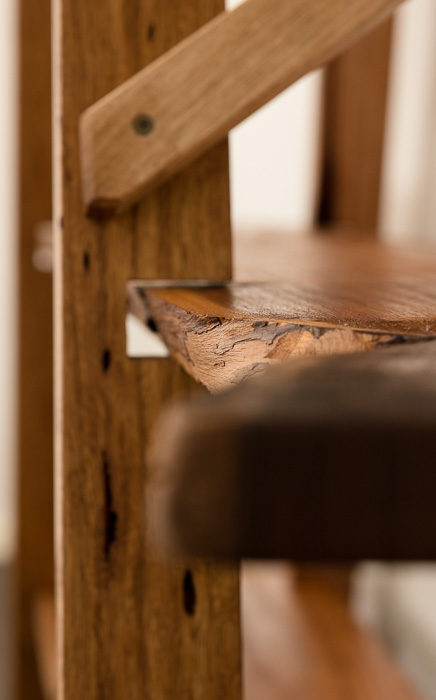
Looking back on the project, I am wondering why I didn’t use wedged through tenons rather than a pinned truss-like system. And then I remember that initially I didn’t know how long I’ll keep the shelves for. And at the time I didn’t have tools on site in order to do that. Currently I think that if I want to use the blackwood for projects, I can swap them for other wood that needs storing.
There are many awesome things that happen upon finishing a build.
Firstly, the relief and elation at seeing and feeling something that has brewing in the minds’ eye for a long time come to reality. The awe of having something before you that others can see, that beforehand was only an idea and an interconnection of inspiration, research and ideas.
Secondly, the strange space of feeling both full with the finished project, and the growing emptiness and hunger for the next thing!
Thanks for reading
Spice Rack
I made a spice rack for a friend that lives in a van. It will be attached above the kitchen bench. I left room under the bottom shelf to attach hooks.

Japanese Cedar Table
I made this as my first ‘fine furniture’ project at Knox Woodworkers Club about 8 years back. I plan to make variations upon this except with a more rounded and streamlined design. I also plan to make ‘tower’ versions with about 3 or 4 levels upon which we can place plants. For anyone that is interested, the original plans can be obtained from here.

The frame was made out of basic radiata pine, planed with a low angle plane to evoke a magnificent lustre in the wood. I finished/polished it with Hard Shellac from U-Beaut in Geelong. I cut the top out of a natural ‘slab’ that was milled off a tree in the Dandenong Ranges. The ‘chatoyance’ of the cedar is incredible. I made a video that shows it clearly and will upload it soon.
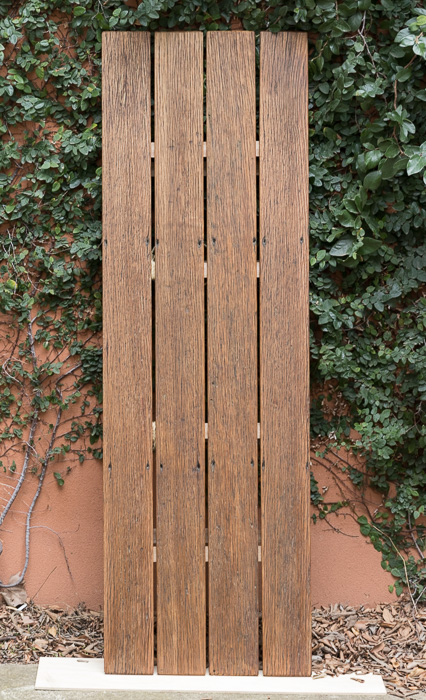
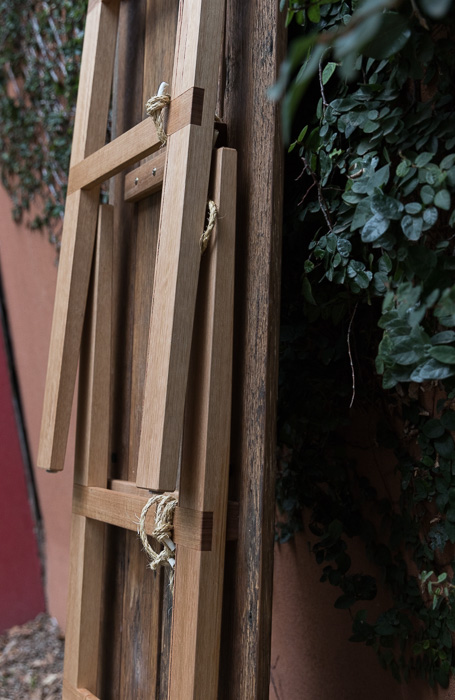
Recycled Fence Paling Trestle Table
I picked up old fence palings from the side of the road. Two years later, they form the top of my desk.
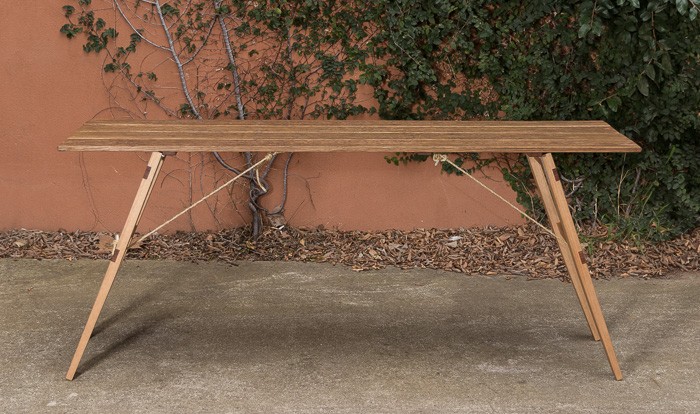
All of the timber was recycled. I only needed to purchase the sisal rope, screws, hinges and glue. The big investment was in the labour of removing all of the ‘crud’ from the palings and hand-planing them down. I love the sheen and weathered texture of the table compared to the ‘plastic’ feeling of modern desks.
The aim was to build a lightweight structure that was easily compacted. I didn’t know when and how often I’d be using the desk, so I wanted the desk to be able to function as a ‘background texture’, in which I could hang or lean it against a wall and hang pictures or artwork from it while not being used. I also wanted to be able to fold it down quickly and easily for transport. If I run markets in the future I may build a bunch of these. I could even sell these at a market.
I have posted images of the finished product. In time, I’ll track down and post images from the build.

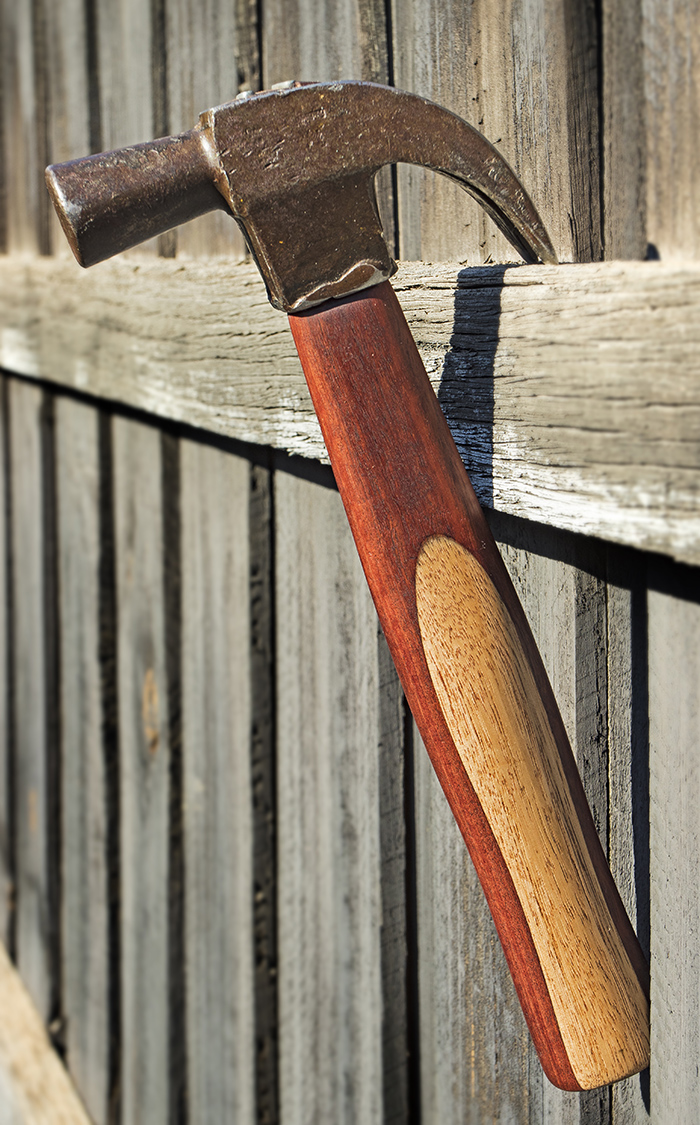
Handmade Hammer Handle
Over the past few years I have been following many trends of people doing their best to reduce the impact on the environment. One approach is in reducing the amount of environmental pollution and waste-to-landfill we create through actions such as limiting our new and non-local purchases and shopping at establishments which minimise or eliminate non-biodegradable packaging. We can also make things that we would otherwise purchase (which incorporates increased mining, transportation, environmental pollution etc) by finding apparent ‘waste’ in our local environment (house and garden, hard rubbish collections, recycling stations, industrial materials recycling centres such as Reverse Art etc). The process is often titled ‘Upcyling’. We often create something that lasts longer, suits us better, is enjoyable and empowering to make and provides years of satisfaction and further inspiration.
5 or so years ago I came across a couple of old hammer heads in hard rubbish and gifted myself some time towards one of my favourite hobbies; woodworking!
The handle on the hammer was broken off. The head had welding around its base. I’m not sure why as I could not locate any cracks. After cleaning up the rust it was revealed that the head was forged in Australia (Cyclone brand).
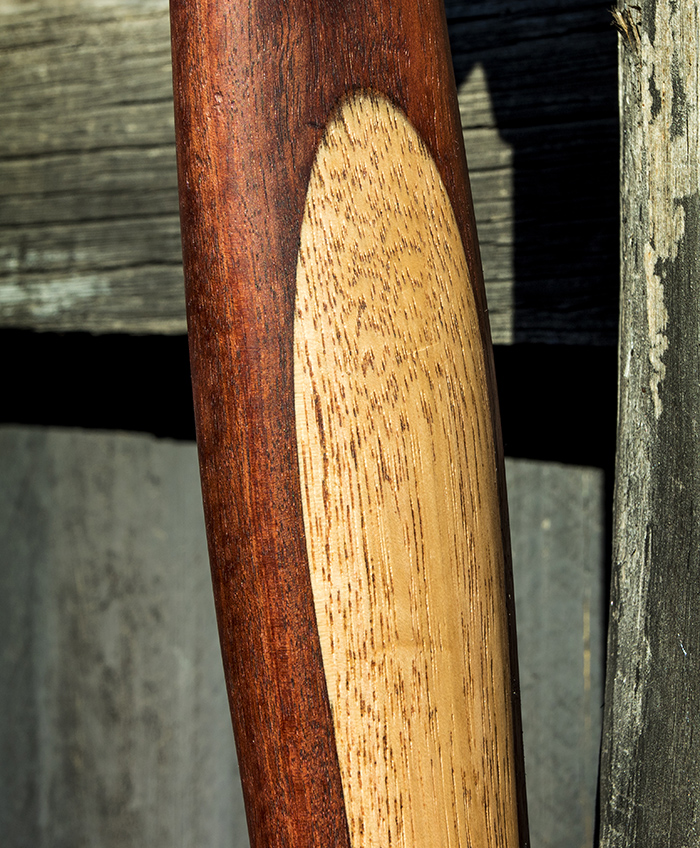
To make the handle, I looked through some stacks of ‘waste’ timber that I had collected about ten years ago whilst working at a timber yard. After looking at many pieces and inspecting the grain, I selected a piece of Jarrah that grows in Western Australian. It was juust long enough for a hammer. It wasn’t quite thick enough for the design I wanted, so I laminated two strips of ‘Victorian Ash/Tasmanian Oak’ (medium strength, strai ght grained eucalypt) to each side/‘cheek’ of the handle.
I would have preferred to make the handle out of Spotted Gum as it is known for having one of the highest degrees of ‘Toughness’. It is readily available in Australia. Unfortunately, I didn’t have any pieces that were seasoned (dry), long enough or wide enough. Jarrah is mid-range in terms of toughness and can be a bit brittle which is not ideal. However, it was what I had available at the time – which is a factor that has dictated the design and construction of things throughout history.
My current hammer, a Stanley is great. It works well, is very solid and made out of ‘standard’ Oak. To me it seemed to be ‘European Oak’ although it could be ‘White American Oak’. My only gripe with the hammer was… the grip! The shape was great but I found it too thin. Perhaps it was designed to suit massive and meaty hands of a full time carpenter?
I glued the Tasmanian Oak onto the Jarrah and left it for a few months. I came back and got to work!
I had no idea that such a project would or could be SO satisfying!!
I used 99% hand tools, which saved me from the headache of loud noise, airborne dust and continually taking safety gear on and off.
To begin with, I marked and then cut out the ‘tenon’ which inserts into the ‘mortise’ of the hammer head. I used chisels to pare down the cheeks of the tenon so that they attained a tight fit into the hammer head. Unfortunately, due to the welds at in the hammer head, the tenon had to be cut a few millimetres thinner than the remainder of the head. This took a lot of extra time. I wanted to remove as little wood as possible, as a tight fit is essential. I could have used a file or sandpaper glued to a dowel or strip of wood to remove some of the welding. I was reticent to do so as I still had no idea WHY the welding had occurred and if removing the welded on metal might cause damage to the hammer head.
I went about the iterative process of ensuring the tenon made a tight fit. Firstly, I hammered the handle onto the head to see how it fit. I then lightly hammered it off and then had a close inspection of the tenon to see dark and/or shiny marks where the wood had compressed. This process took about 4-5 rounds. For the last trial, the hammer head still didn’t fit on the whole way but was within 1cm. This was perfect as I didn’t want to take off any more wood than was necessary. The final amount is compressed when the head is finally hammered into place. Wood slowly shrinks over the years, so a tight initial fit is important to ensure a long (and safe) service life.
Now that the tenon fit the hammer head, it was time to shape the handle. This was my favourite part! As I mentioned earlier, I wanted to make a wider than usual hammer handle. I used my Stanley hammer handle as a template for the ‘bulbs’ (areas that are extra wide) that ensure a strong and tight grip during heavy hammering. The design of the handle is thin at the beginning so one can hold the hammer close to the hammer head for delicate and fine hammering such as starting off a nail. Then there’s a bulb just less than halfway down the handle, a thinner section to fit my hand during heavy hammering, and then another bulb at the very end of the handle which performs the most essential task; ensuring that the handle does not slip out of my possibly quite tired and sweaty hands, fly off and cause potential damage!
To begin with, I placed the handle in a large wood faced vice. I used a Stanley 5 ½ Jack Plane to chamfer the longitudinal edges of the block at roughly 45°.
Now that this was performed, I used a drawknife to create the long taper in towards the tenon of the hammer head.
I carefully chiselled ‘buttresses’ or ‘shoulders’ around the beginning of the tenon, to squarely and securely seat and contain the hammer head.
I then used one of my favourite tools; the humble Spokeshave! Spokeshaves are effectively mini wood planes, with a small blade set between short metal strips. It is held with a hand on each side, and can be pushed or pulled. It shaves off thin wood shavings, and is excellent at creating round shaped stock such as spokes for wagon wheels or the legs of a chair. Due to its short bed depth, it acts very different to a standard plane. Instead of creating an even and flat surface, spokeshaves can be effortlessly manoeuvred to shape curves. To create the valley between the two bulbs on the handle, I moved the spokeshave back and forth quickly in that spot to remove the exact amount wanted.
I find using a spokeshave infinitely satisfying. It is quiet, meditative, easy, fast and effective with the ability to create unique shapes and curves.
Once the handle had been shaped…it was pretty much done!
I used a power sander to quickly sand the glue off from the butt of the handle, and then the spokeshave again to chamber around it.
Finally, I hand sanded the handle to 600 grit. 240 grit would have been sufficient however I wanted a nice finish to reduce potential splintering. The ‘bulbs’ were large enough to compensate from the slightly smoother finish that can become extra slippery in sweaty hands.
Now…..on to what was for me the hardest part…. Making the wedge. I didn’t have a bandsaw or finely set circular saw…. So I went back to first principles. I wanted to make a wedge out of ‘Victorian Ash’. I found a small block of 19mm (3/4”) thick timber with consistent straight grain which was not in line with the length of the timer. My idea was to simply use a large chisel and the natural grain direction to quickly and easily knock out a wedge.
This process worked simply enough, however unfortunately the angle of the grain against the square edge of the timber was a little too high for the hammer head I was using. For some reason, the widened opening at the top of the hammer head mortice seemed a lot wider than usual. This meant that a very thick wedge needed to be used. I made a thick wedge which took a lot of hand sanding to get the exact depth, thickness and angle to suit.
Throughout this process, it became obvious to me that such a wide wedge would almost definitely crack one of the tenon cheeks of the relatively brittle jarrah. I decided to proceed out of curiosity of how it would fit and the acceptance of the possibility of total failure.
If I was intent upon ensuring no cracks in the jarrah handle, I could have done two things.
One, I could have run a test piece; cut another tenon in another piece of jarrah, fit it into the hammer head, hammered in a wedge and tested for strength.
Two, I could have handmade two small wedges and delicately placed or glued them onto the outside of the cheeks of the tenon (after it was inserted and hammered onto the hammer head). This would have ensured that the jarrah was much less likely to crack by reducing the required width of the acting central wedge. In retrospect I would have done this.
In the interest of time I decided to go ahead and attempt the overly thick wedge as an experiment and learning experience.
So I went for it…
I used a tenon saw to cut a kerf in the middle of the tenon. I cut it roughly 3/5 down the tenon, aligned with where the hammer head tapered out along the cheeks of the mortice.
I used the Stanley hammer to hammer the handle on the head as far as it could possibly go. I was very satisfied (and relieved) that it made perfect contact against the small chiselled shoulders at the beginning of the handle. Stage 1 went well!
I then placed and hammered the wedge into a small cut/kerf in the tenon. The wedge went in well and seated at its full depth. As expected, I head a quick ‘snap’ sound which I assumed to be one of the tenon cheeks. So the hammer will be weaker and less durable as a result, but fortunately strong enough to function. I just know NOT to use it for full weight hammering or removing nails from hardwood. This was fine for my purposes, as I’ll keep this hammer inside for small jobs like hanging picture frames, and the existing hammer will stay in the garage.
I didn’t add glue to the wedge to keep it in place as I prefer to ‘keep it natural’. It also allows room for modification as the timber slowly shrinks over the years. As mentioned, wood shrinks slowly over time (‘creep’). There could be a time when it is helpful to hammer the wedges further in.
Once the wedge was in place, I used a saw to cut off excess tenon and wedge. I then used a power sander to roughly flatten it. I didn’t bother making it overly ‘pretty’ in this spot. Sometimes it is nice to leave a few surfaces looking raw and rustic!
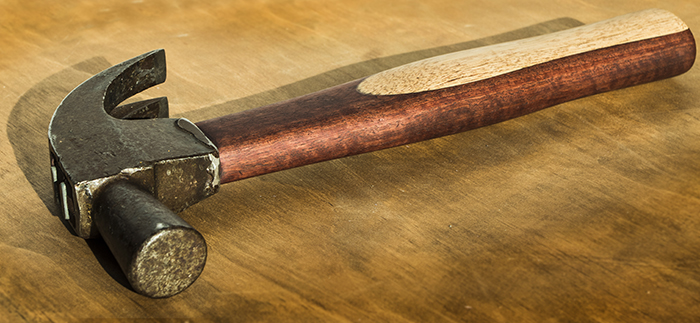
The next step was to re-shape and hammer in small steel wedges perpendicular to the long wooden wedge. Fortunately I had also found a smaller hammer head and was able to salvage metal wedges from it. The steel wedges ‘stretch’ the end of the tenon in the other direction. This ensures that all parts of the tenon are wider at the end of the tenon, than at the shoulders so that the head will not fall or slip off during use.
Postscript:
The hammer has functioned much better than I expected. I have used it to hammer in and lever off nails without any issues. From the outside, the wedges appear as strong as when they were first placed. One thing that I did before attaching the handle was use a bench grinder to ‘sharpen’ the tynes. I’m really glad I did as it has worked wonders. I can hold the hammer backwards and dig the tines in like an adze. This has been very very useful for pulling apart pallets as I can wedge and prise apart components that have been nailed together. It is also a great way to pull up nails that were loose and smacked down into wood. I highly recommend doing trying this out.
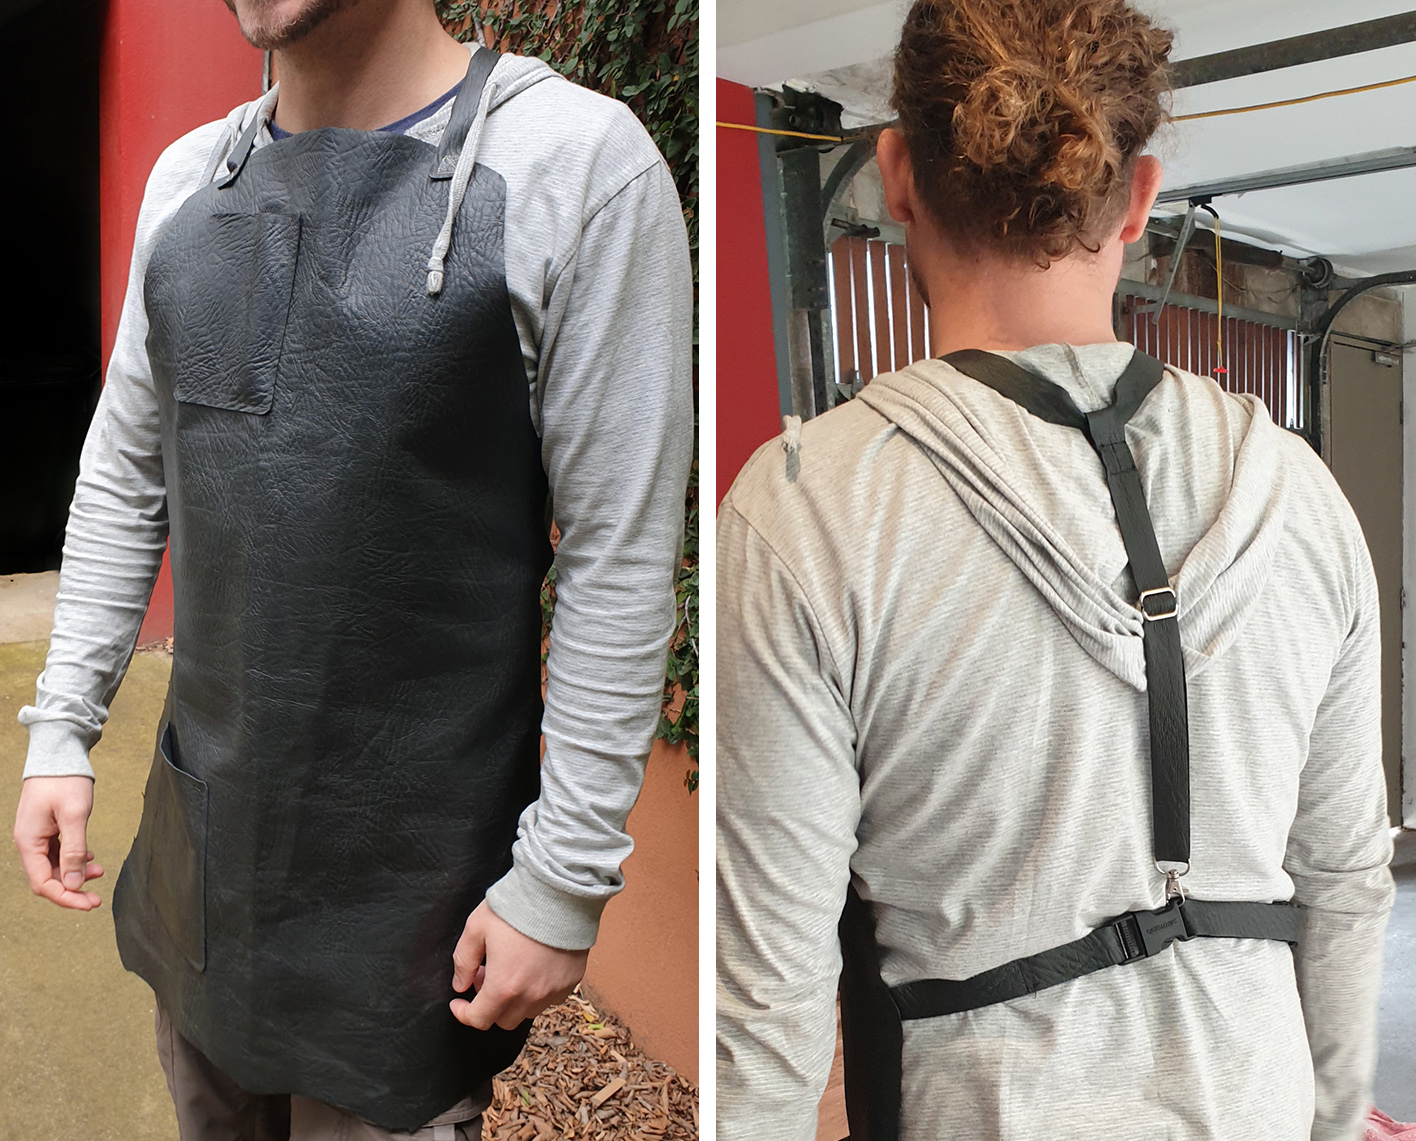
DIY Leather Apron
A friend of mine has had an angle grinder cut into his chest. Thankfully it got stopped by his breastbone! I don’t know if he was doing something silly with the grinder, but accidents can and do happen!!
I have had little wires from rust removal wire wheels on grinders fly off and embed into my leg. A couple of them took a month or two to come out.
As a result of those experiences, I made a leather apron. I wanted a custom fit and a high neck area for max protection while metalworking and for when I learn to forge.
It was easy and cheap (because I already had leather… and I asked others to do the sewing ). Here are pics of the design in case someone wants to make one. You may notice that the hardware is random – I just pulled it off old bags etc that were destined for landfill.
Other Projects
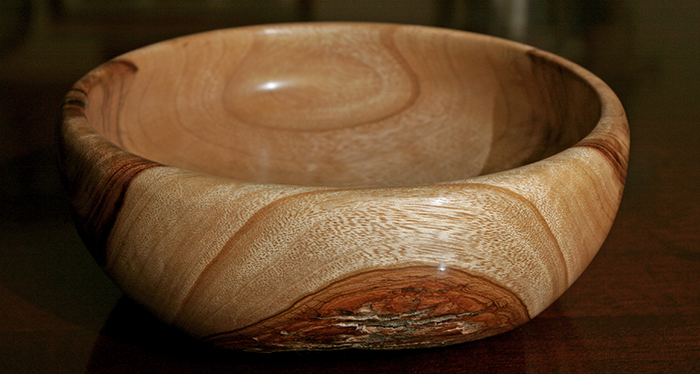
Camphor Laurel Bowl
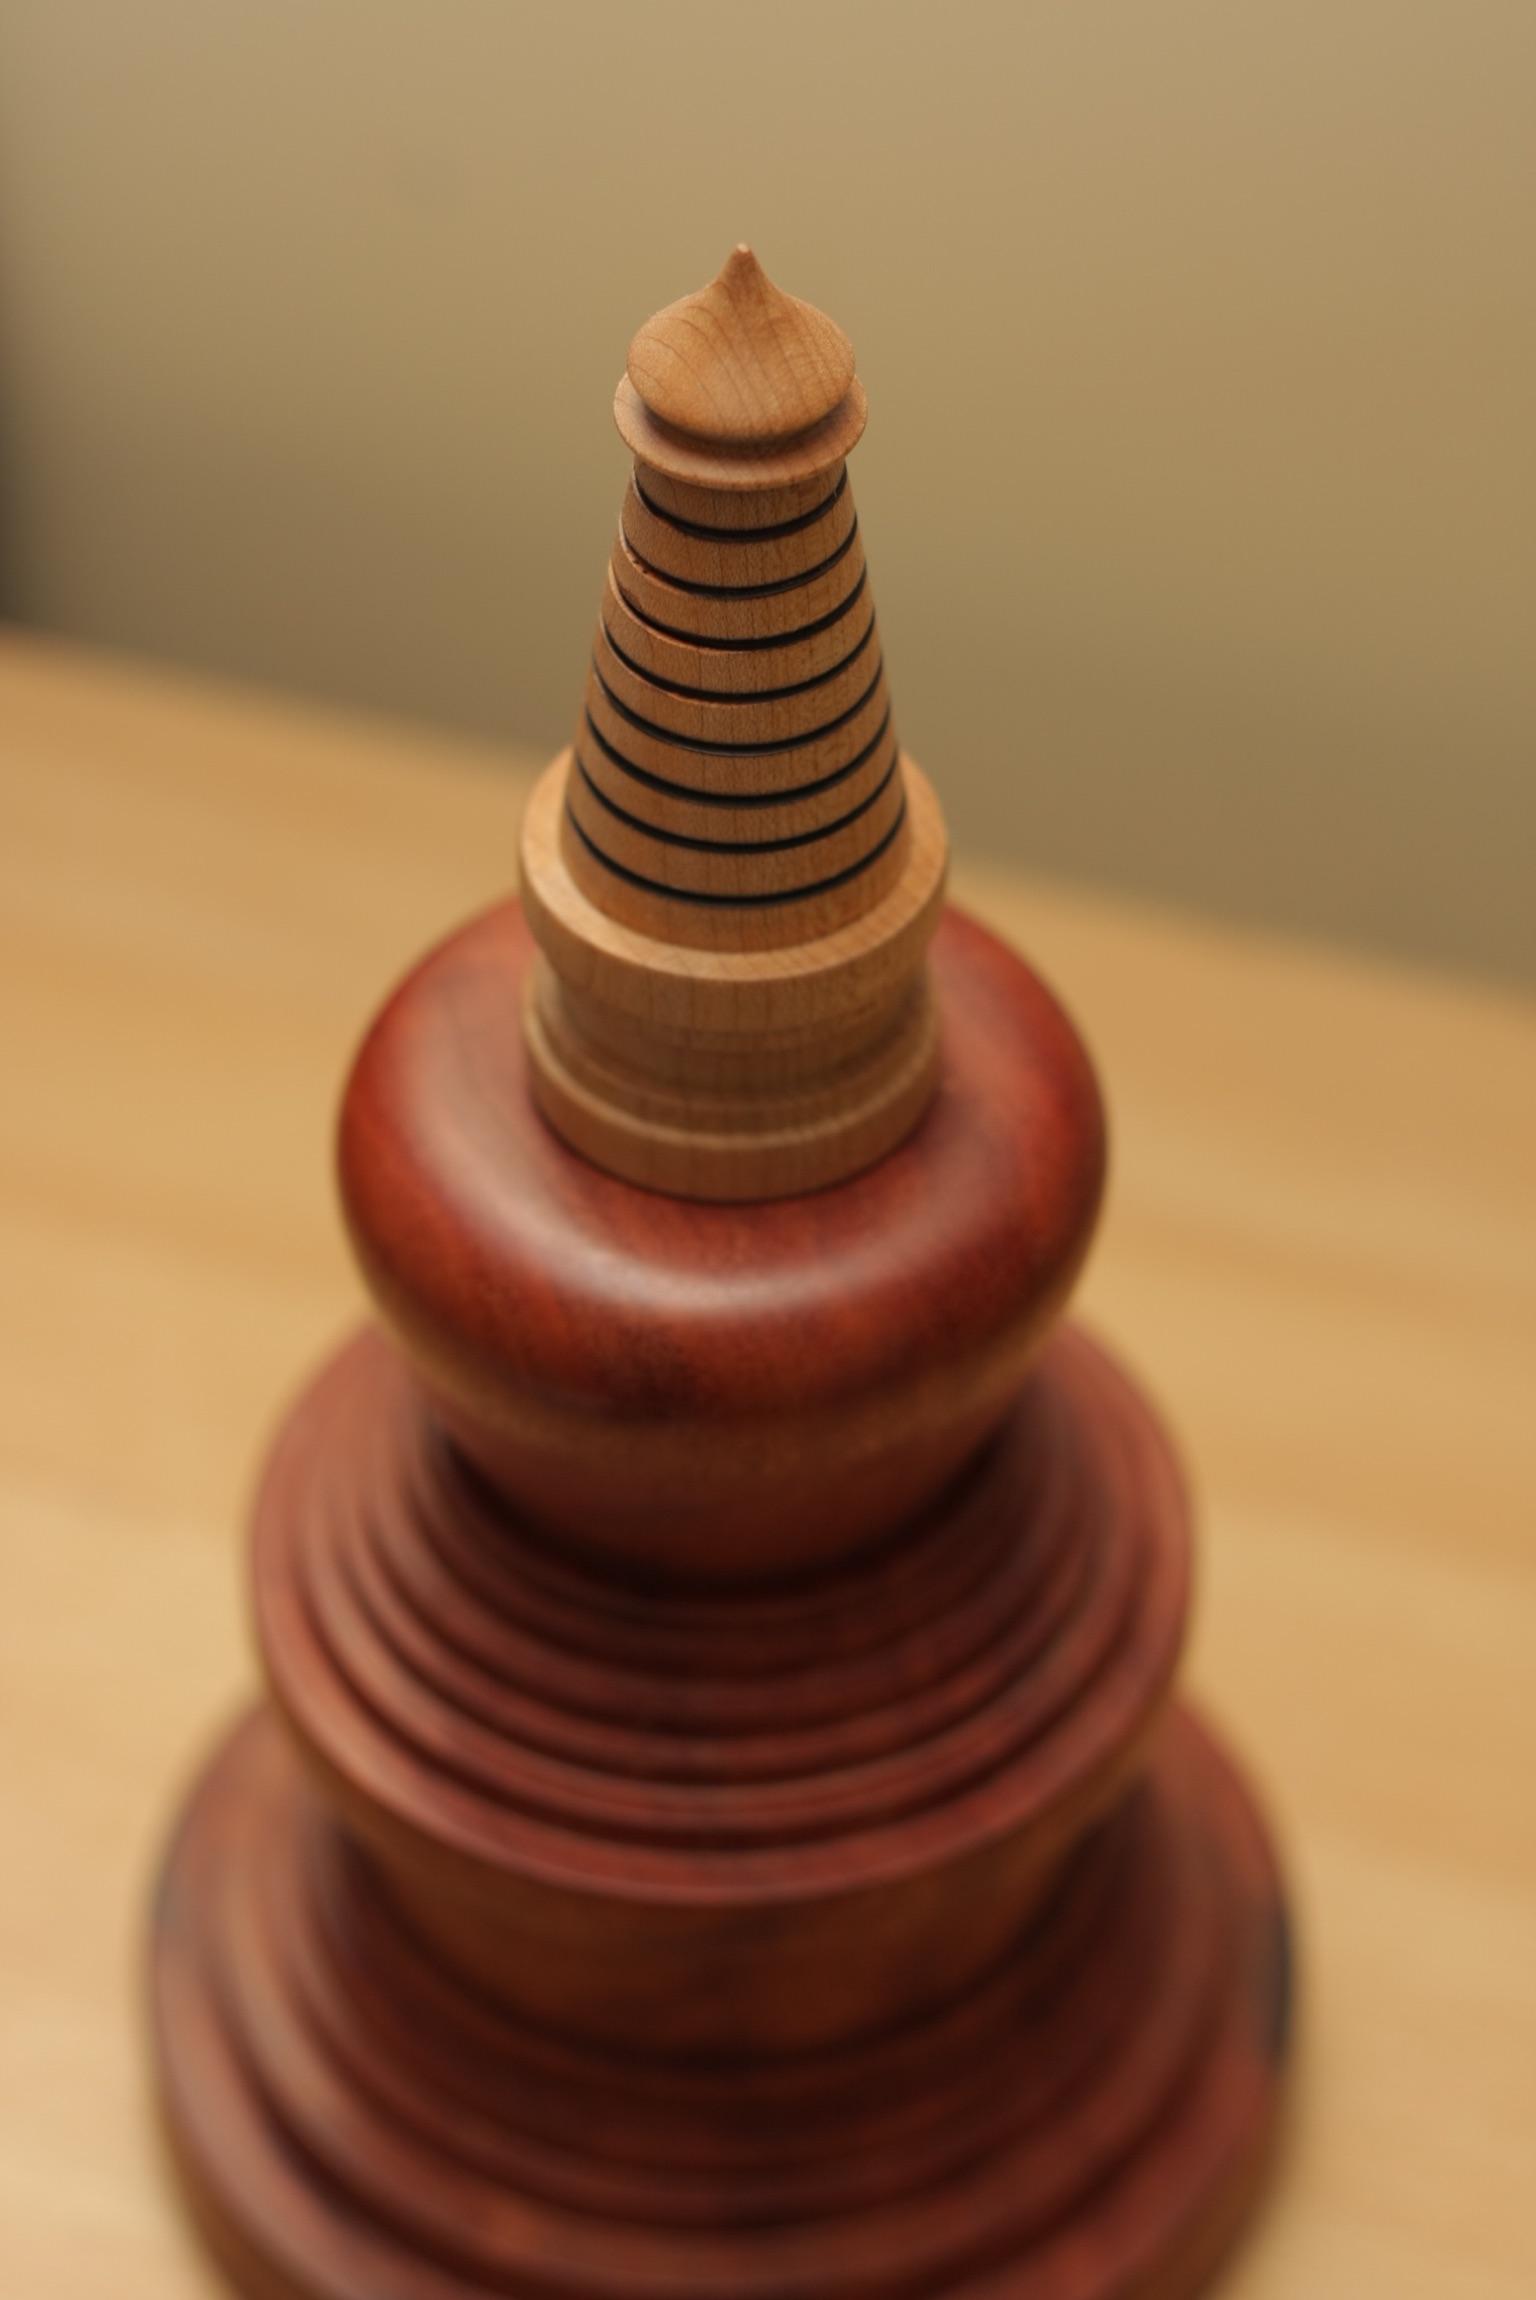
Buddhist Stupa that I made for a friend. The base is made from a reg gum fence post. It took 3-4 hours to make as my tools needed constant sharpening and I got a lot of tear out doing the different levels. In comparison, the top was incredibly fast, easy and satisfying to make. I think that the timber was Cherry.
I made a jewellery bowl for my sisters’ 18th birthday out of American Ash. I designed it so that the centre point has 18 rings. The ash was a beautiful timber to work with.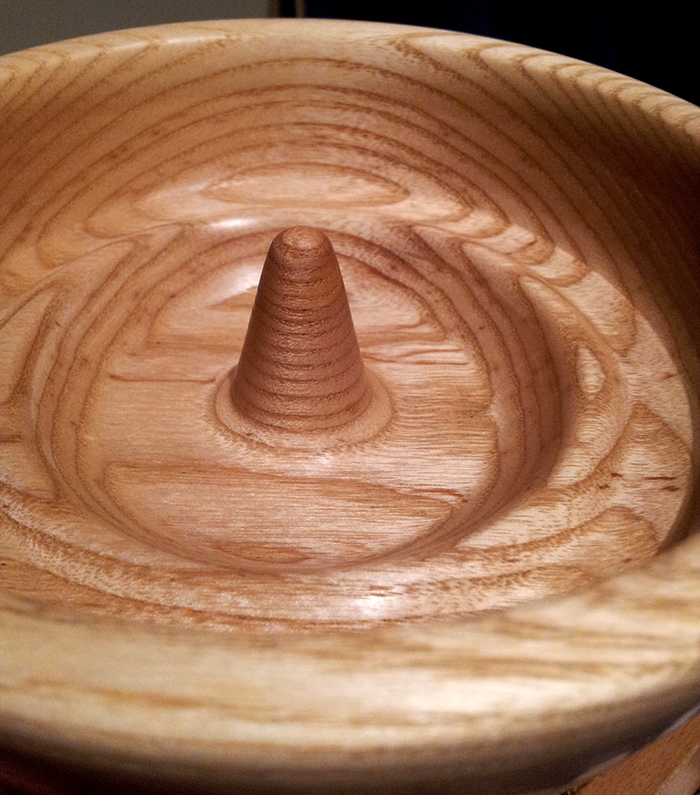
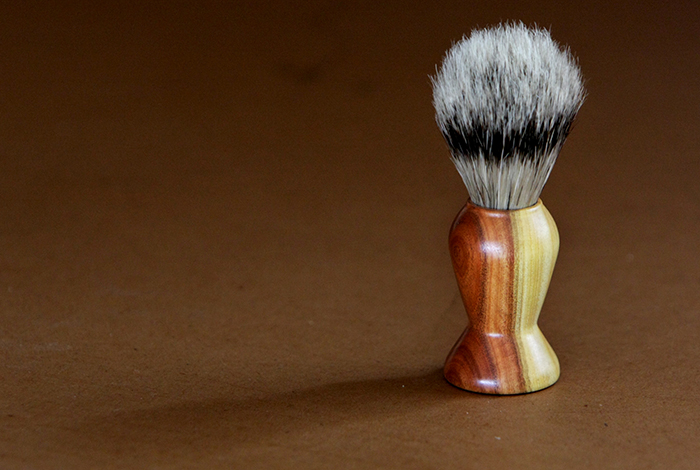
Mulga Shaving Brush I made for Dad
I fixed up an outdoor setting. I ended up sanding the timber so nicely that the table and one seat now stays indoors!

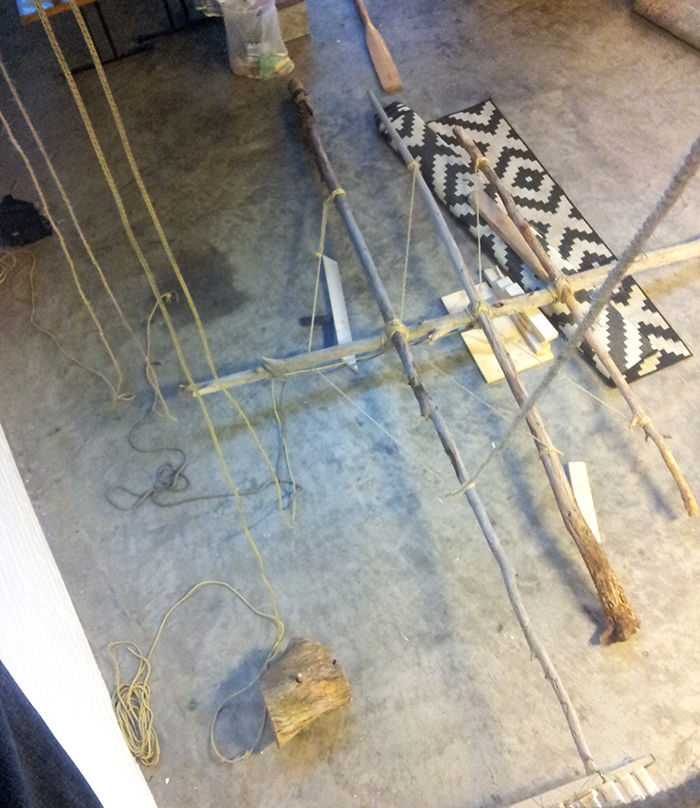
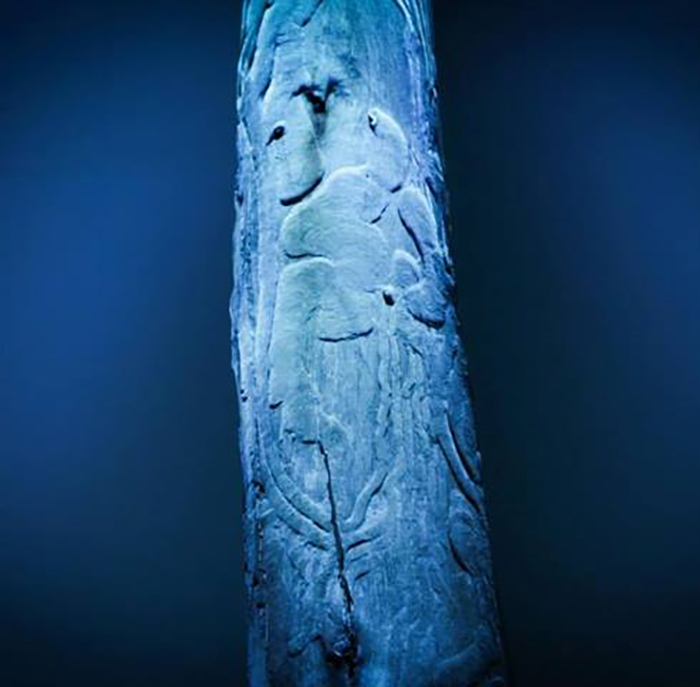
Here is a sculpture I made for a NYE event called TRIBE. It was used for 3 years. (The middle piece is wonky in one of the pictures. I fixed it up after the photo.) The wood was collected from a local area from dead trees that has magnificent beetle patterns in the sapwood.

Thanks for reading 🙂